|
Over the years we've accumulated quite a library of photos and videos of 401A Slant-o-Matic machines and accessories. Here's a collection of the best for your viewing pleasure. Check out our 400-Series Slant Needle page for more information. Happy Sewing! |
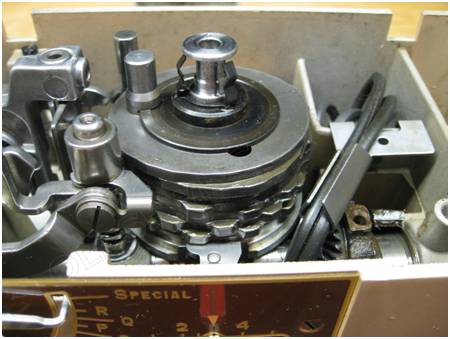
| | The Singer 401A is legendary for its durability and power. Like the old Timex, it can take a lickin' and keep on stitchin.' After all, it has steel gears, doesn't it? Yes, the 401A is famous for it's Made in the USA steel gears, but did you know that the 401A has ONE gear that is NOT steel? In fact, the gear in question isn't even metal.
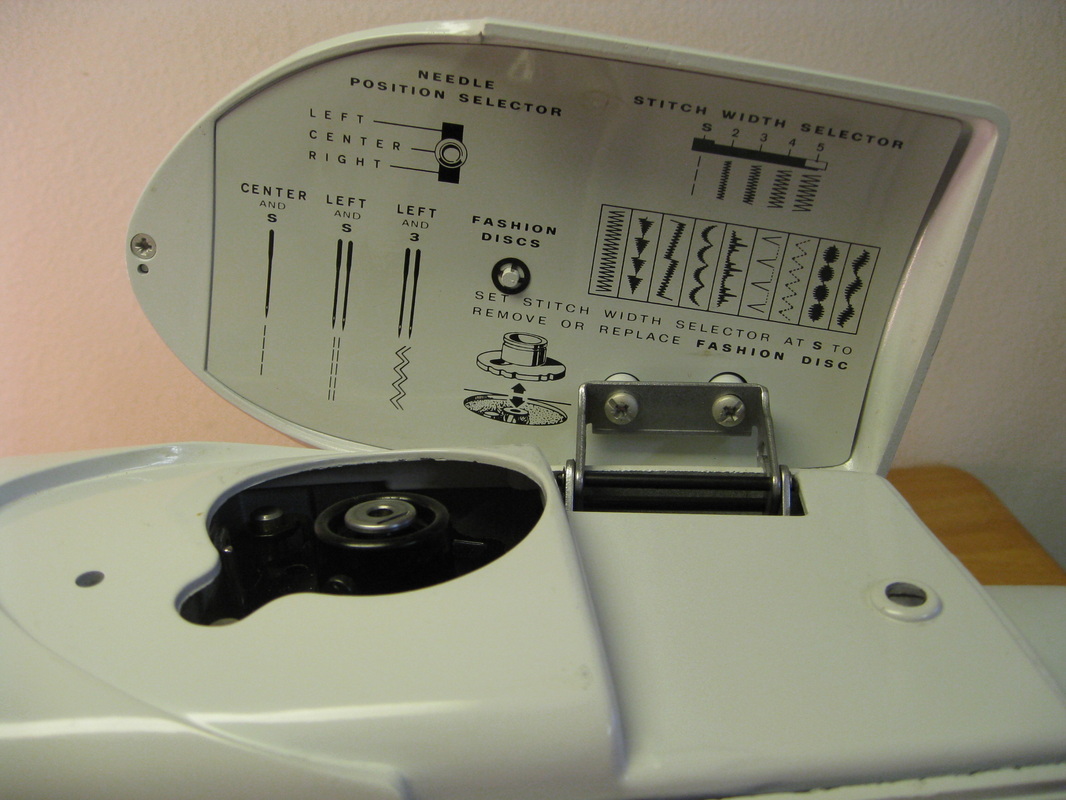
The 401A is often touted as an "all metal" or "all steel" sewing machine, but neither description is strictly accurate. The 401A machine head is cast aluminum, which is lighter-weight than the earlier cast iron straight-stitch machines. The 401A's casting is heavier than the Featherweight 221 or 301, but it's still aluminum. Inside the 401A, the needle bar, cam-stack, cam followers, hook, and driving gears are nearly all steel parts. Nearly... 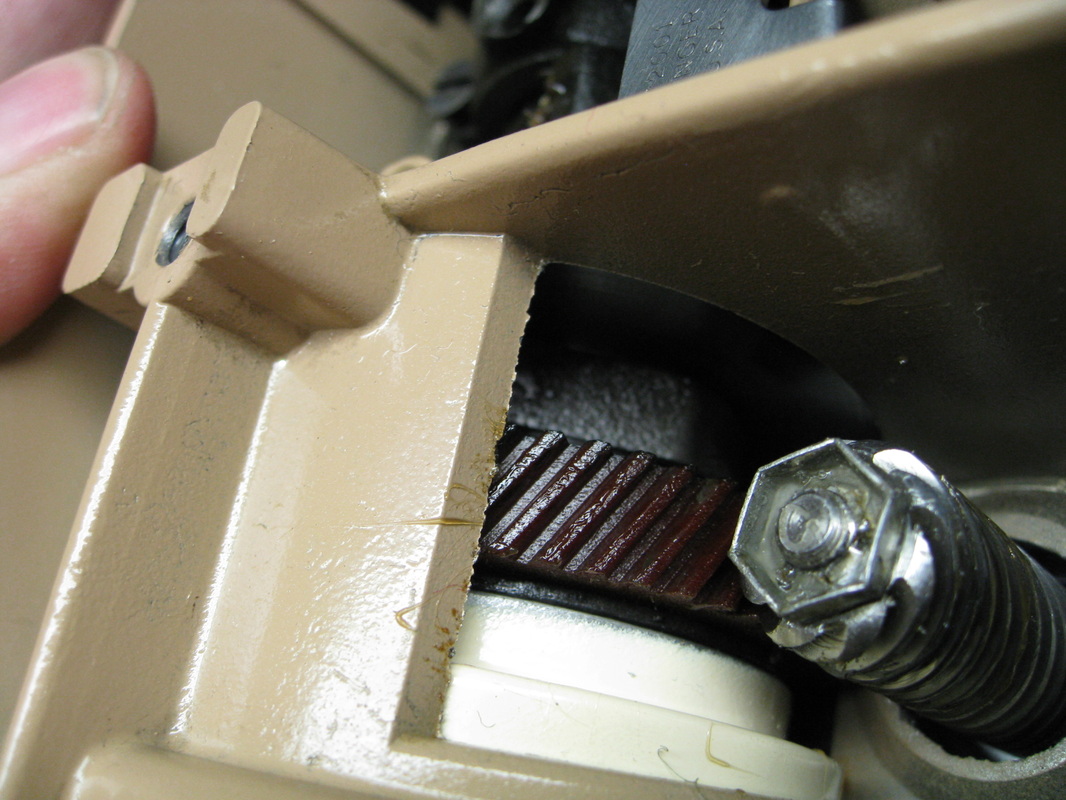 Nylon handwheel gear - Singer 401A The exception is the large gear that sits just inside the handwheel and engages the upper machinery to the vertical motor drive shaft. This particular gear is 1/2 inch thick and made of an extremely durable plastic composite. It may not be steel, but whatever the stuff is, it stands the test of time, because you never hear of this gear stripping, breaking, or cracking. Unlike the plastic and nylon gears that Singer used on later models, this substance just quietly does its job year after year after year. The material in question is most likely Textolite, which consisted of woven fibers infused with bakelite. If you examine these gears closely you can see the cross-hatch of woven fibers, and the service manual for Singer 201 refers to a similar gear as a "textolite gear." Textolite was a brand-name patentend by GE in 1936 and heavily promoted through the 1950's for everything from laminate counter-tops to tile floors. So now you know the 401A's dirty little secret. It's not "all steel" and it isn't even "all metal." But it is still unquestionably one of the finest Singer sewing machines ever built. Happy Sewing! Barbara OldSewinGear...dedicated to helping you get the most out of your old sewing gear. Updated 12/13/14: Thank you to members of the Vintage Sewing Machine Facebook group for prompting further research into Textolite, which led to revisions of this article! |
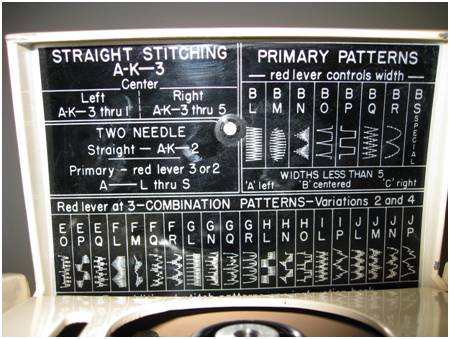
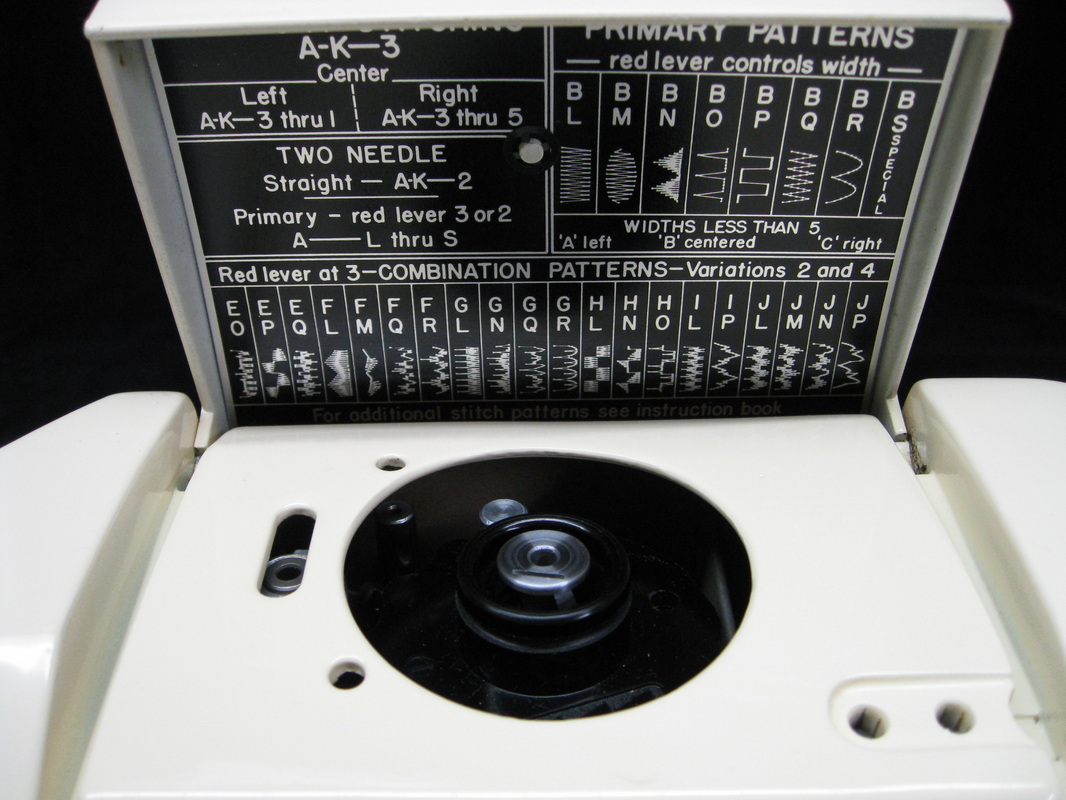
| | This is a very good question, and one I hear often from 401, 500, and 600 owners. This simple answer? It depends on how creative you want or need to be. As shown on the flip-top chart, the 401 has an impressive array of built-in stitch patterns with almost infinite range of length and width variations.
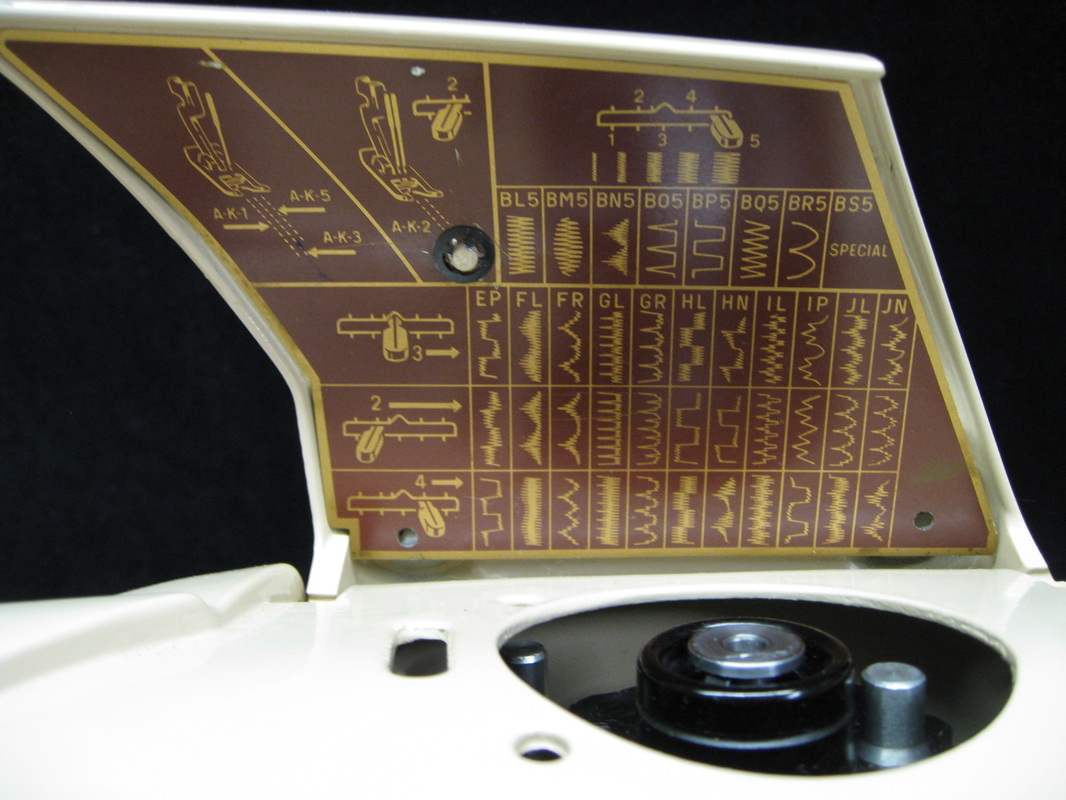
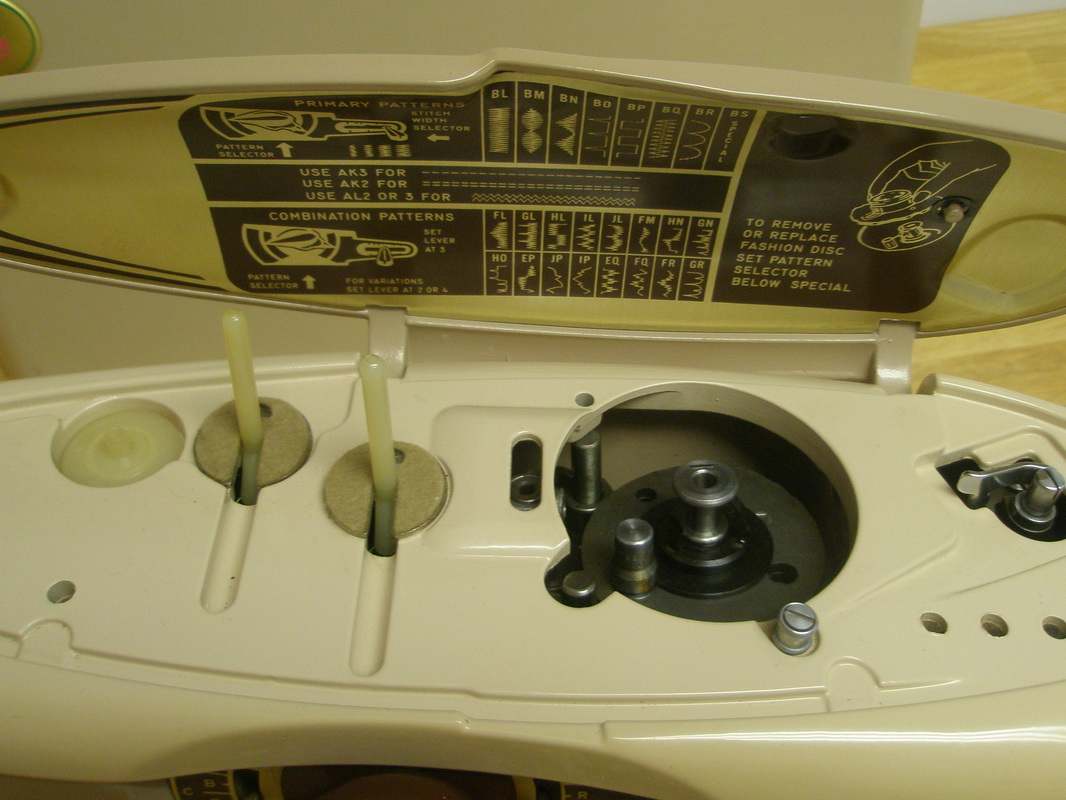
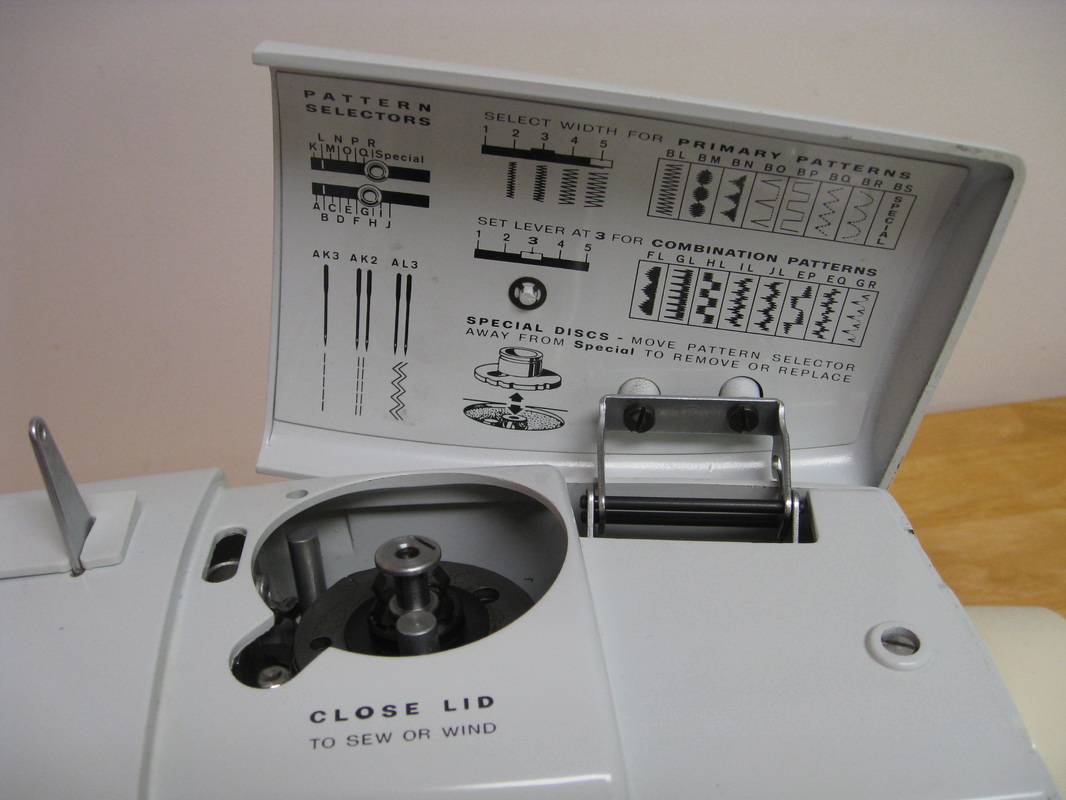
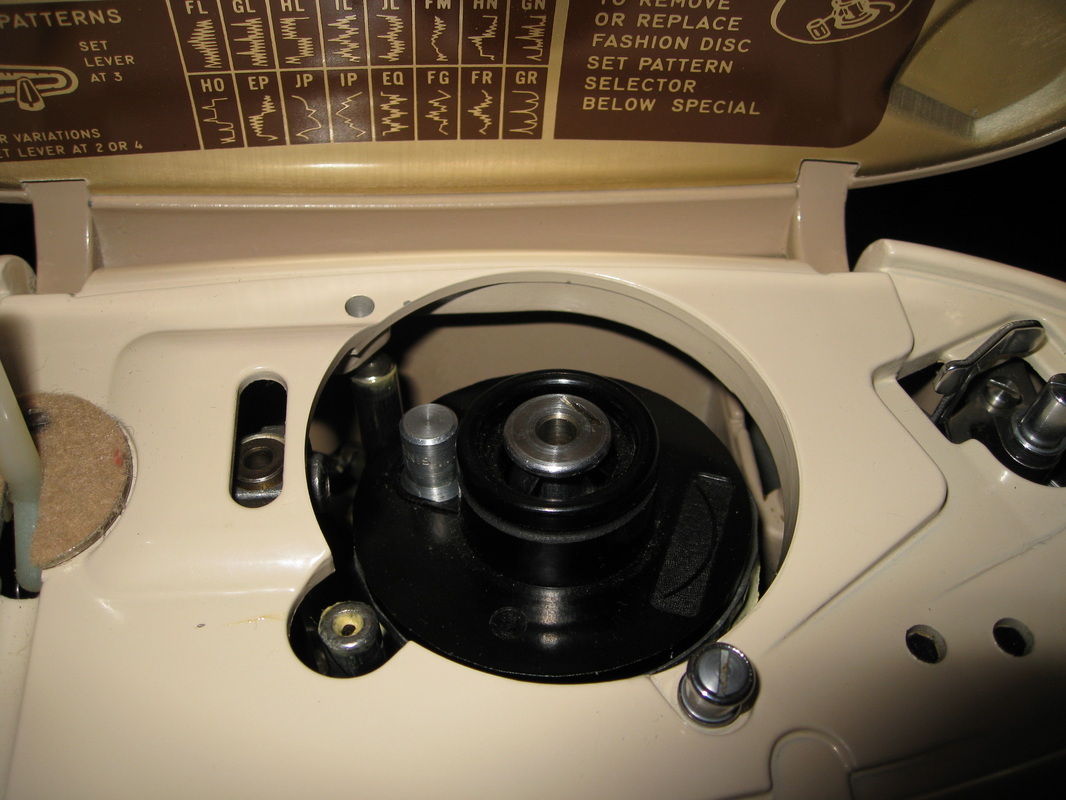
If you look at the 401's built-in cam stack each cam represents a different stitch pattern. And when you factor in that the 401 can "combine" two cams to create additional stitch patterns, it's pretty awesome what the 401 can do without Special Discs. But if you want to get the maximum creative use out of your 401, you will definitely want a set of Special Discs. Why? 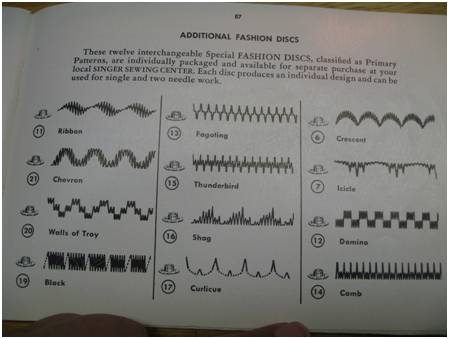 Special Disc patterns from 500A manual. The original accessories kit for the 401 included 5 Special Discs (numbered 1-5) for stitches that are not built-in. These 5 discs can be combined with the built in Primary stitches to produce additional patterns, such as scalloped zigzag. However, Singer produced a total of 24 Special Discs for the Slant-o-Matic and 600-series Touch & Sew family, which means there are 19 additional discs available. Some of these additional Special Discs are patterns which are not built-in, while others are duplications of stitches built into the 401. However, even duplicates can add to the range of stitches the 401 can produce. "If it's already built-in, why would I want the Special Disc too? The answer lies in the distinction between "Primary" patterns and "Combination" patterns. "Primary" patterns use a single cam in the cam-stack to produce the stitch. This means that the stitch pattern is unchanged regardless of width and length settings. In other words, a scalloped stitch simply gets wider or narrower but still looks the same. In the sample shown here, the width of Special Disc #12 has been set progressively wider. 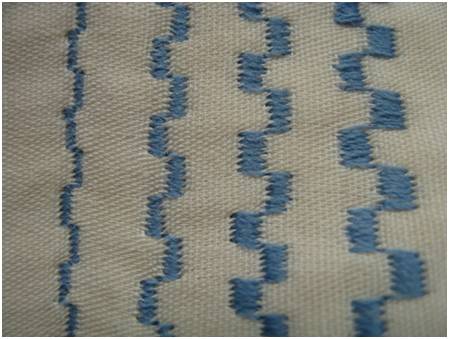 Special Disc #12 at widths 2, 3, 4, 5 (Primary) On the other hand, "Combination" patterns use two cams in the stack to produce the stitch pattern. Which means that a change in stitch width affects the movement of both cams, which can greatly affect the overall appearance of the stitch. Note in the sample shown here how the appearance of stitch setting DP changes when the width is set progressively wider. The zigzag blocks get narrower as the offset gets wider. 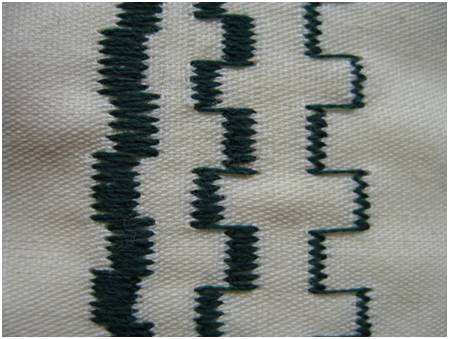 Built in stitch DP at widths 2, 3, 4 (Combination) While this does add some variety to the built-in stitches, it also means you are somewhat limited when using built-in stitch patterns if you want the pattern wider or narrower. The 401 and 500 have seven built-in "Primary patterns. They're shown on the top row of the chart (see photo above) inside the flip-up lid. Which is where Special Discs come in. Special Discs are considered "Primary" patterns, so they look the same regardless of width. Clearly an advantage in some situations. Another advantage of using a Special Disc is that two-needle stitching only works with "Primary" patterns, because the left-hand stitch selector has to be set on "A." So if you like the look of a "combination" stitch but want that stitch in double-needle, you'll need to use a Special Disc. Built-in Primary patterns can also be combined with certain Special Discs to produce additional stitch patterns. The final advantage of Special Discs is that they are just plain easy to use. Pick a pattern, pop it in, and away you go. No messing with dials or charts. So, DO you need a complete set of Special Discs for your 401, 500, or 600 sewing machine? Bottom line, it's up to you. The choice is yours. Happy Sewing! Barbara OldSewinGear...dedicated to helping you get the most our of your old sewing gear. For additional information about Special Discs see the articles: How to Use a Singer Special Disc Disc-o-mania! Special Discs & Fashion Discs |
| |  Singer 500A Accessory Box Singer 500A Accessory Box So you're looking to invest in a vintage sewing machine and wondering what to look for in accessories and attachments. Getting confused? You're not alone. So let's take a look at what you'll need. First of all, it's a good idea to acquaint yourself with what originally came with the model you're shopping for. Do some comparison shopping on eBay to get familiar with what a basic package for your model looks like. Then purchase the best equipped machine in the best condition you can afford.  Singer 401A instruction manual Singer 401A instruction manual Keep in mind that you can always fill in any gaps later, but the basic "Must Haves" for ANY machine include the following: Instruction manual. Original paper is best, but a CD copy or download is a good choice too. A good manual will explain the basic functions of the machine but also cover routine maintenance and adjustments to keep your machine in good working order. Singer's website offers free downloads of many of their manuals.  Screwdriver, lint brush, & machine oil. Screwdriver, lint brush, & machine oil. Screwdriver & Lint Brush Set. These are essential for adjusting bobbin thread tension, tightening the needle clamp and presser foot, and for attaching feed dog cover plates. You need large and small standard screwdrivers for most Singer machines. A lint brush is handy for keeping your bobbin compartment clean. Machine Oil and Motor Lubricant. These are a must to keep your machine running smooth and strong. Apply as directed by your machine's manual. 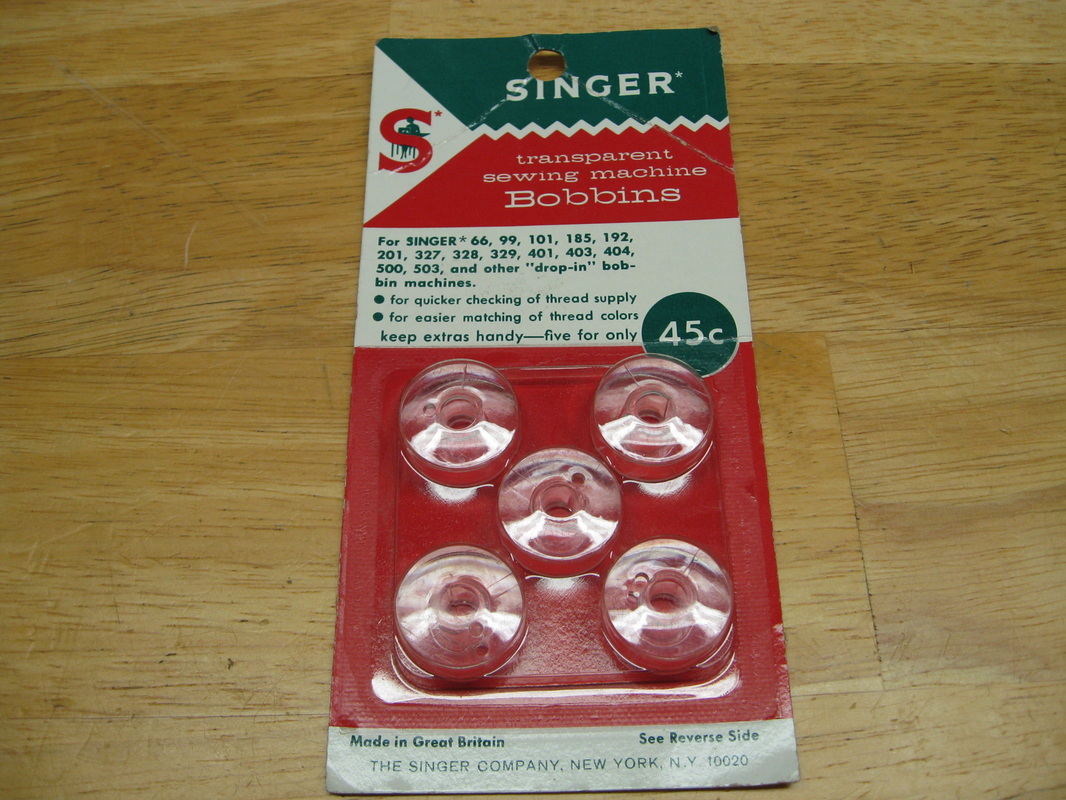 Vintage Class 66 Singer Bobbins Vintage Class 66 Singer Bobbins Extra Bobbins. If you do any amount of sewing you'll need extra bobbins right away. Plan on purchasing a package if your machine doesn't come with extras. That's the basic starter equipment you'll need for any sewing machine. So what else might you need? 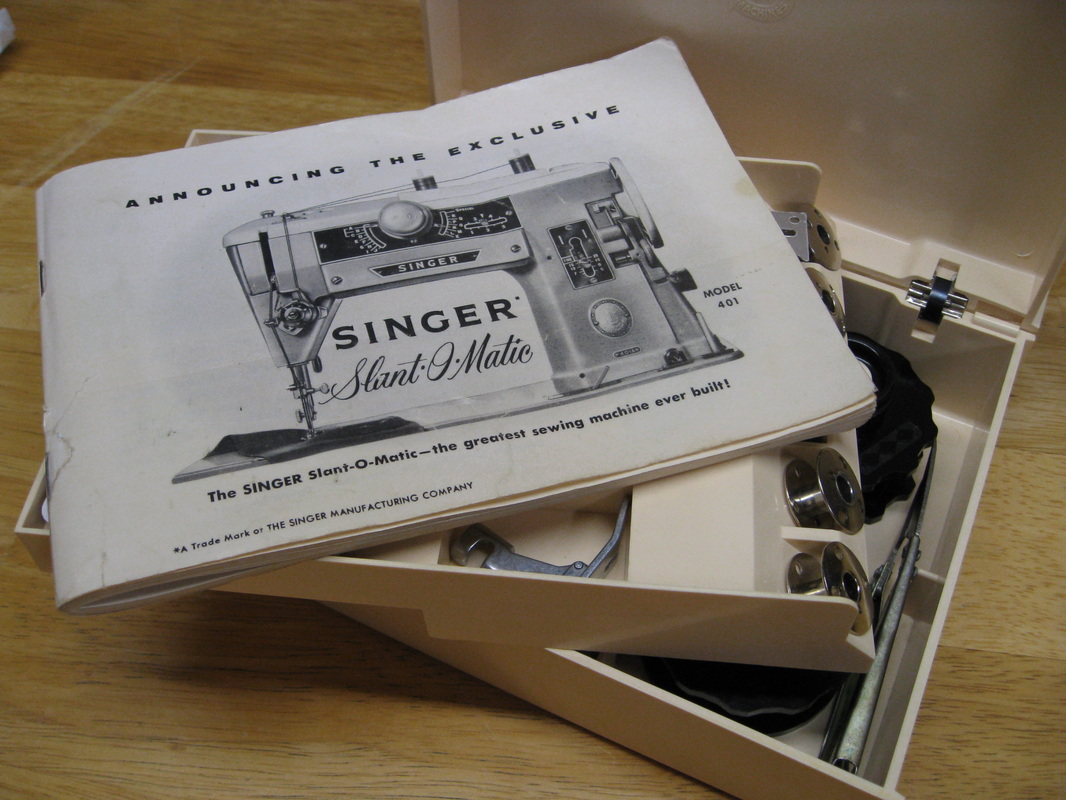 Inside Singer 401A accessory box Inside Singer 401A accessory box Let's take a look at what came standard with a 401A Slant-o-Matic. The 401A came equipped with a hard plastic accessory case with a lift-out tray. Divided compartments held the following: 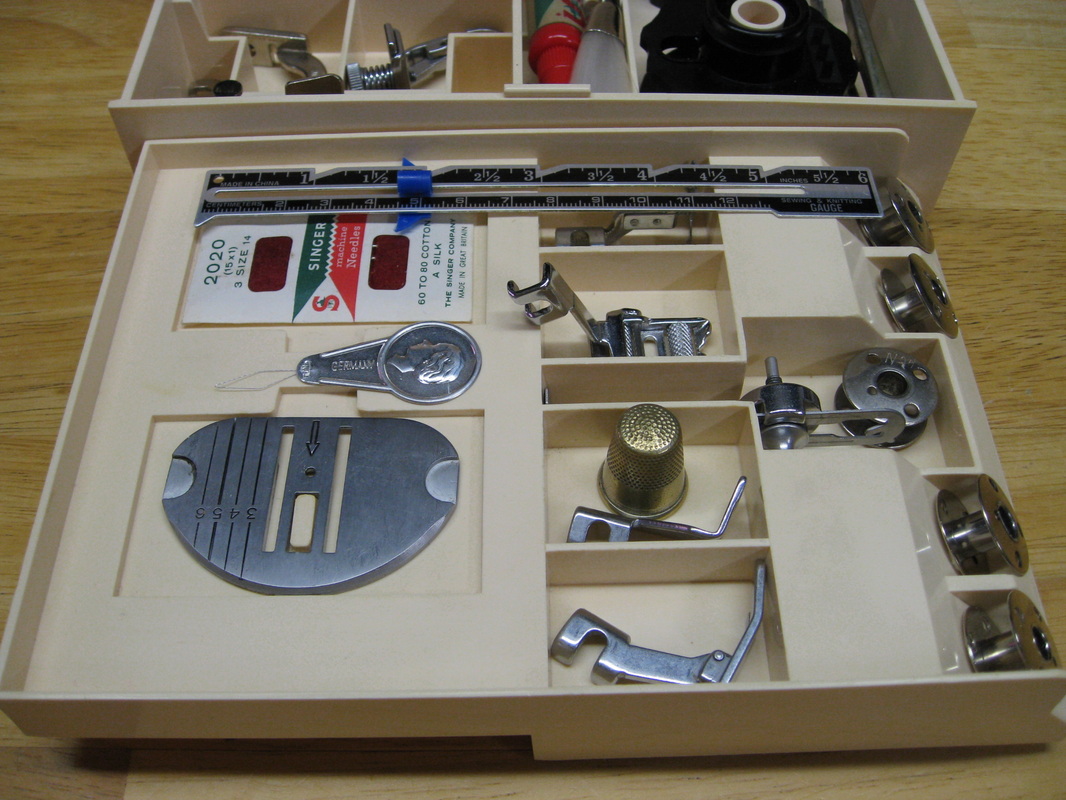 Singer 401A accessory box insert tray Singer 401A accessory box insert tray Top tray: Instruction Manual 4 Bobbins Zigzag needle plate Straight-stitch needle plate Adjustable edge guide Standard zigzag presser foot Special purpose presser foot Button presser foot Straight-stitch foot 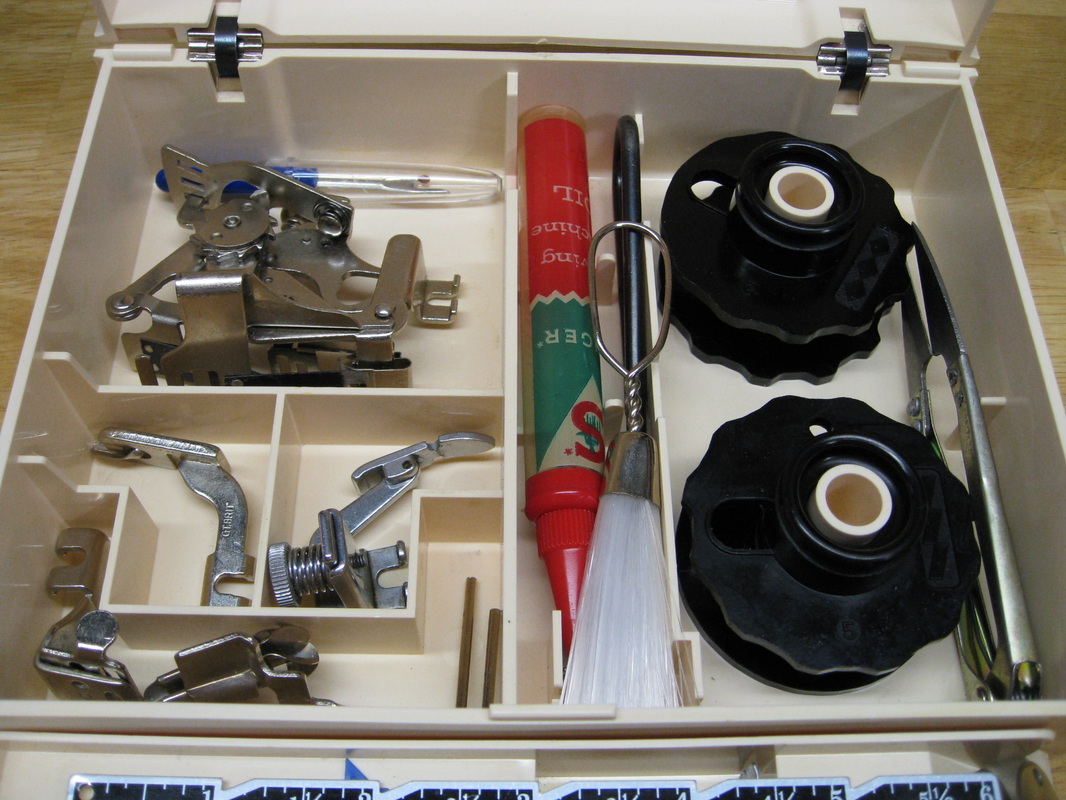 Singer 401A accessory box bottom tray Singer 401A accessory box bottom tray Bottom Tray: Hemming foot Zipper foot Multi-slotted binder Ruffler Oil bottle Large screwdriver Small screwdriver Lint Brush Special Discs 2, 3, 4, 5 (Disc 1 was inserted in machine) As you can see, the 401A sewing machine came with quite a package of accessories, but there were additional items that could be purchased separately. These included Buttonholers, Even Feed Walking Foot attachments, and additional Special Discs for added creativity. (See the article "Do I need Special Discs for my 401?" for more information.) So if you're looking to invest in a vintage sewing machine, you can start with the basics and build from there, or you can look for a machine that already comes with all the bells and whistles! Happy Sewing! Barbara OldSewinGear...dedicated to helping you get the most out of your old sewing gear. |
| | 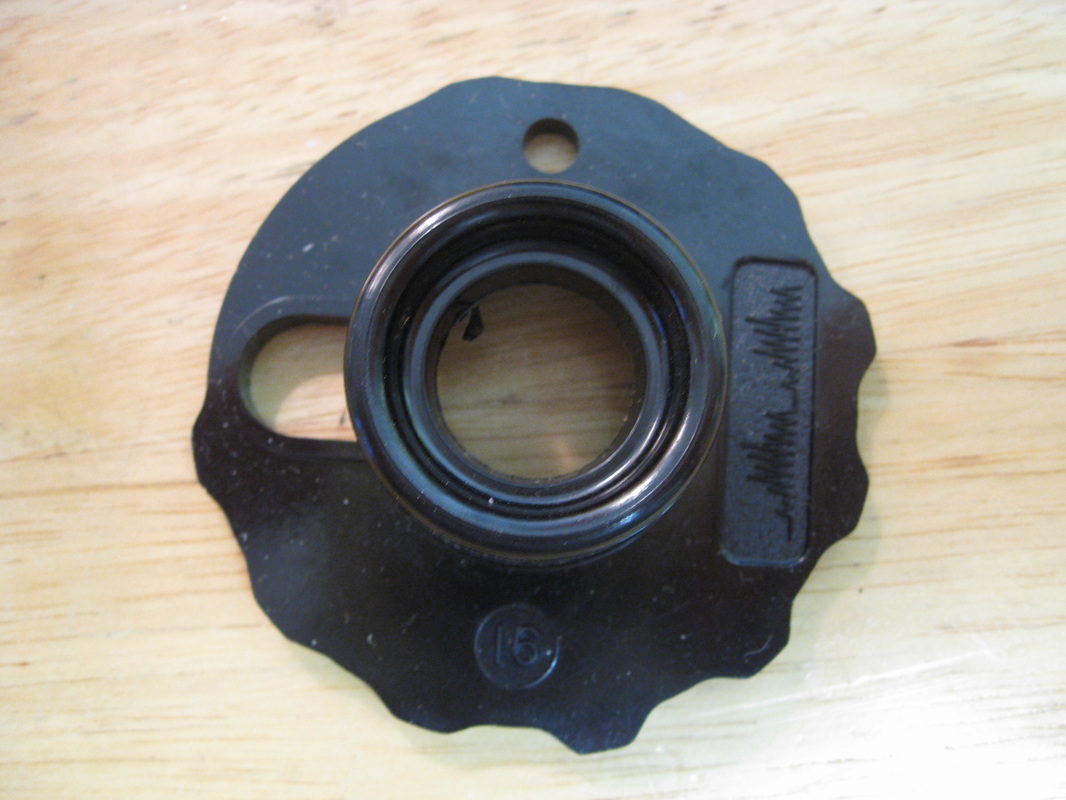 Singer Special Disc #16 Singer Special Disc #16 Ever wondered how to use a Singer Special Disc? It's actually pretty simple! First, select the stitch pattern you want to use. There are 24 discs available for the Slant-o-Matic and early Touch & Sew machines. They are numbered 0-23, with 0 being standard zigzag and 23 being basting stitch. Next, open the lid on the top of your machine: Check to see if there is already a disc in the machine:
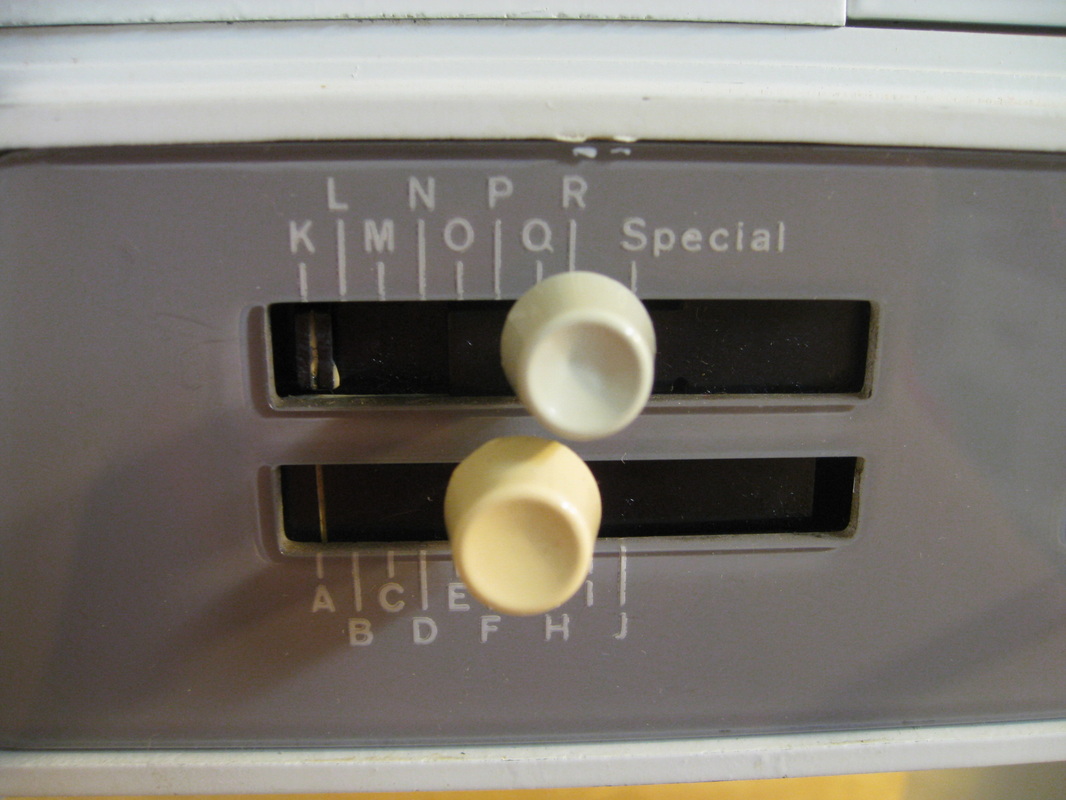
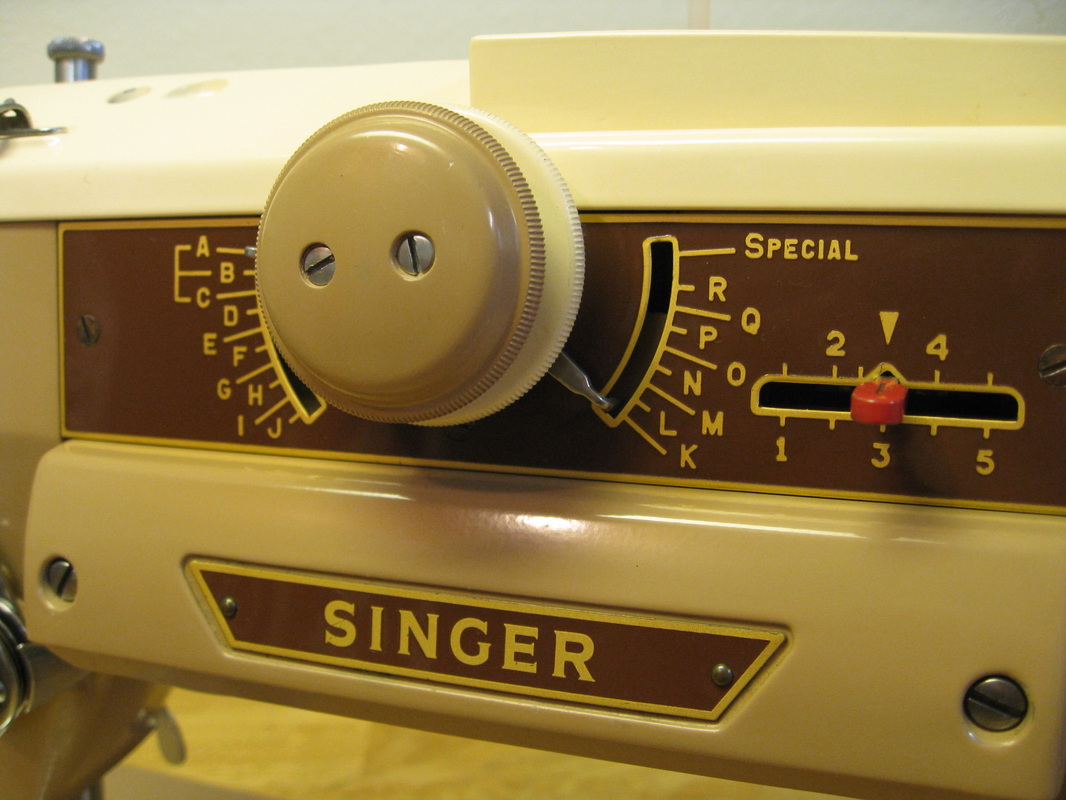 Singer 401 stitch selector knob. Singer 401 stitch selector knob. If there is already a disc in the machine, you will need to remove it before inserting the disc of your choice. To remove or insert a disc you may need to adjust the knob or lever settings on your machine. If you have a 401, 411, 500, or 600 model, make sure the stitch selector is NOT on "Special."
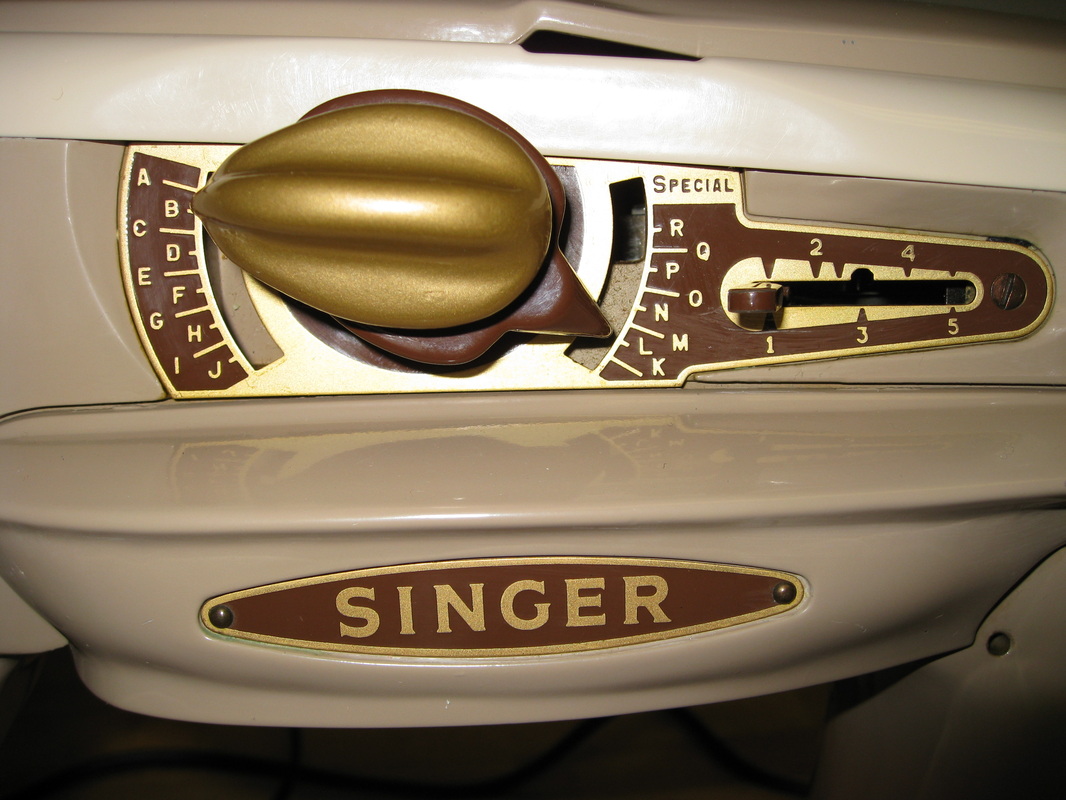
 403 stitch width lever 403 stitch width lever If your machine is a 403, 503, or 603 model, set the stitch width lever to "S" or "STR". Grasp the raised center portion of the disc firmly and pull straight up. There's no special trick to this. As my dad always says, "Pull hard and it'll come easy." Now you're ready to insert your chosen disc. Line up the holes in the disc with the two posts in the disc compartment. Press disc firmly into place. There should be a slight click when it's fully seated. Let's look at it in motion: 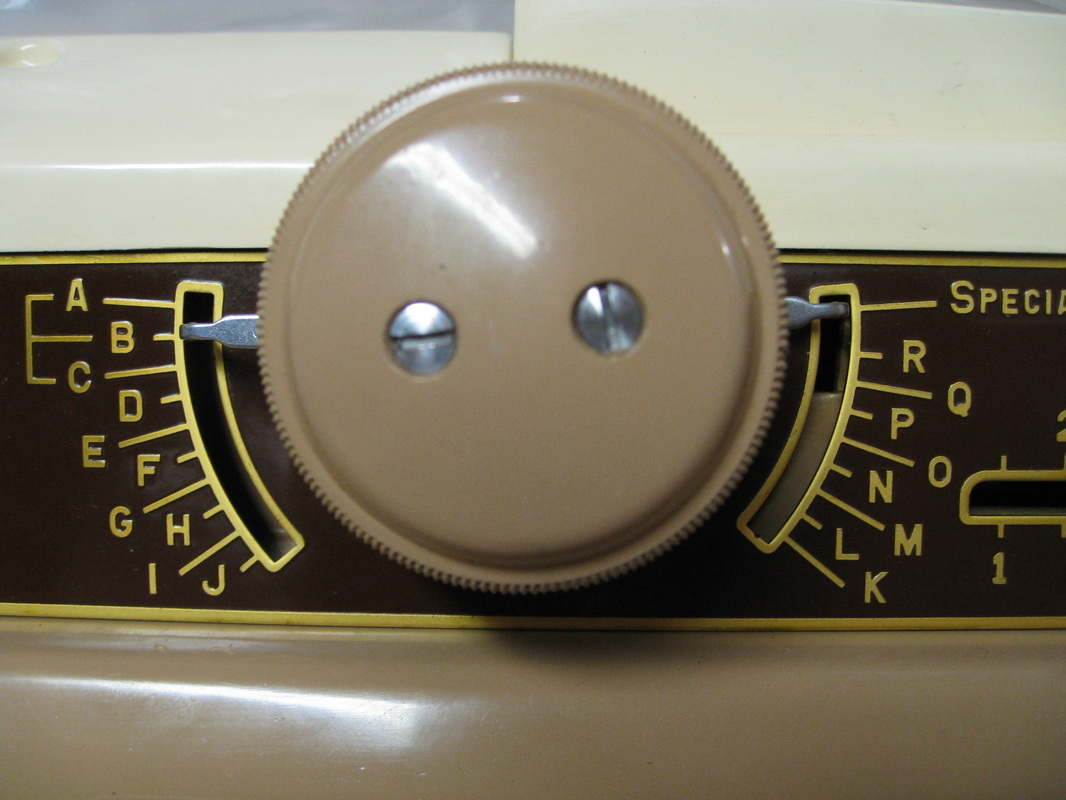 Next, readjust knobs & levers for Special Disc sewing. For 401, 411, and 500 machines, set large center knob at "B" on the left and "Special" on the right. For 600 machines, set the upper stitch selector lever at "Special" and the lower stitch selector lever at "B". Then set stitch width lever to desired width. For 403, 403, and 503 machines, set stitch width lever to desired width. Finally, adjust the stitch length lever to desired density. Special Disc patterns typically look best when sewn at the shortest stitch length possible. That's it! You're ready to sew. It's really that easy. Happy Sewing! Barbara OldSewinGear...dedicated to helping you get the most out of your old sewing gear. If you haven't already done so, I highly recommend getting a copy of the instruction manual for your machine. Singer offers free downloads of most manuals on their website: htty://www.singerco.com/accessories/instruction-manuals |


News, Reviews,
& How-To's
See "Article Index" for list of past articles by title.
See "Frequently Asked Questions" for quick answers to common questions.
Check out "Cheat Sheets" to download printable reference sheets.
See "Resources" for links to useful websites and forums.
See "Frequently Asked Questions" for quick answers to common questions.
Check out "Cheat Sheets" to download printable reference sheets.
See "Resources" for links to useful websites and forums.
Contact Us
Questions, comments
or suggestions?
Contact us!
or suggestions?
Contact us!
Categories
All
15-125
15 91
192 Spartan
201
221 Featherweight
301
328
401
403
411
500
503
600
603
626
99
Adjustment/repair
Appraisal & Pricing
Attachments
Bobbin
Centennial
Checklist
Dating
Greist
Historical Info
How To
Japanese
Miscellaneous
Model Comparisons
Reviews
Shipping
Singer
Slant Needle
Tips & Tricks
Toyota
Toys
Treadle
Video
Archives
June 2020
April 2020
August 2019
March 2018
October 2015
August 2015
March 2015
January 2015
December 2014
November 2014
October 2014
August 2014
June 2014
March 2014
February 2014
December 2013
November 2013
September 2013
August 2013
July 2013
June 2013
May 2013
April 2013
March 2013
February 2013
December 2012
November 2012
October 2012
September 2012
August 2012
June 2012
About Us
OldSewinGear is the collaborative effort of retired repairman Gary and daughter Barbara. We love old sewing gear and enjoy sharing what we've learned in our vintage sewing machine adventures. We are located in Roseburg, Oregon.
 RSS Feed