OldSewinGear
  • Blog
    • Blog Index
    • Site Map
  • Singer
    • Slant Needle >
      • 301
      • 401 / 403 / 404
      • 500 / 503
      • 601 / 603 /604
    • Class 15 Machines
    • Class 66 Machines
    • Featherweight
    • Swing Needle
    • Toy Machines
    • Accessories >
      • Buttonholer
      • Discs & Cams
  • Others
    • Pfaff
    • Elna
    • Necchi
    • Japan Class 15
  • Resources
    • FAQ
    • Links
    • Cheat Sheets
    • Shipping & Packaging
  • Contact
    • About Us

Ruffles Have Ridges

3/31/2018

9 Comments

 
I'm finally back in the sewing room and my latest project calls for long decorative ruffled strips.   How tedious...sigh...

Hold on, didn't Singer make an attachment for that?

​I'm embarrassed to admit that after all these years of loving, refurbishing, and selling these machine I never actually took the time to learn how to use the ruffler.   Time to correct that omission.  So today I pulled out my sewing machine manual and learned something new.  

And let me tell you, the ruffler is a pretty nifty little gadget.  As always, I am amazed at how Greist and Singer found ways to make repetitive sewing tasks simple, precise, and fast.  

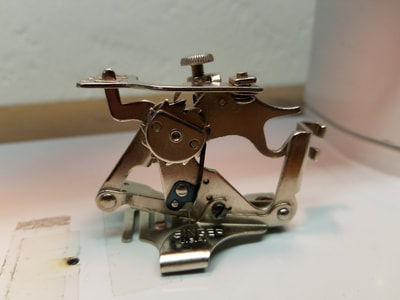
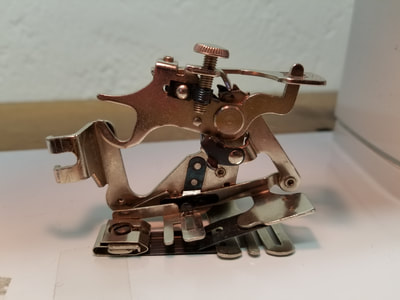
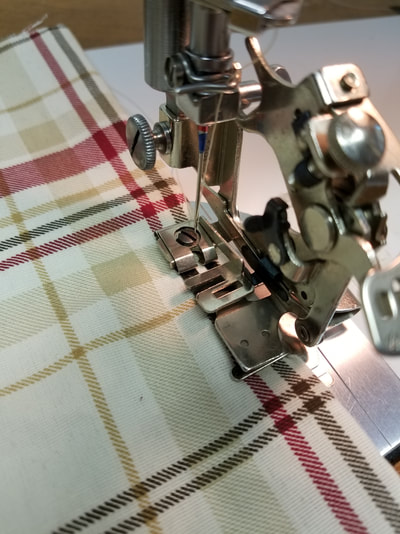
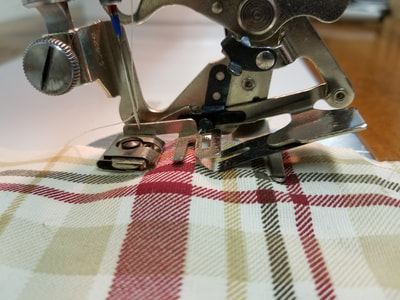
​Here's what it looks like:  
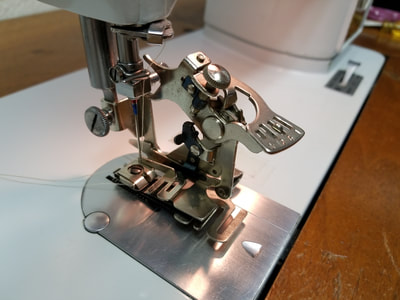
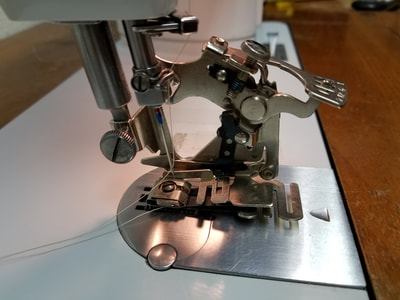
So now we've seen it, but how does it work?   
I could try to describe it, but it's so much better to see it in action. 
 

So there you have it - how to use a ruffler.  I'm honestly shocked that I never tried it before.  It's actually very easy to use and the results are beautiful.  

Why not give it a try!    


Happy Sewing!
Barbara


​OldSewinGear...dedicated to helping you get the most out of your old sewing gear.  
9 Comments

Rocket-eer Surgery

6/8/2014

2 Comments

 
One of our readers asked how to reassemble the stitch-length adjustment knob on her 503 Rocketeer.  She took hers apart to clean it and then encountered a problem getting the pieces back together.  I didn't know the answer either, so I went and asked the resident expert.  He explained it to me and I went and tried it out for myself and took some pictures and videos to share.

Without further ado, here's how to reassemble the 500/503 stitch-length adjustment lever knob.   First we'll look at taking it apart and then we'll look at putting it back together.

Picture
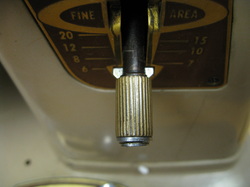
The lever has a knurled knob on the end that tightens up against the face plate to select the desired stitch length. 

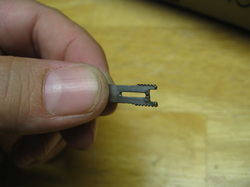
There are two wings on the lever that slot into the notches at the "fine" selection and the "6" selection to lock those settings into place. 

Picture
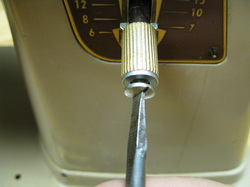
To disassemble the knob, use a standard screwdriver to remove the screw at the end of the shaft.  Then pull the whole knob assembly toward you.  It will slide off along with the small washer that sits on the end of the shaft between the screw and the knurled knob.

Picture
The winged piece screws up inside the knob and will have to be unscrewed for proper cleaning and lubricating. 

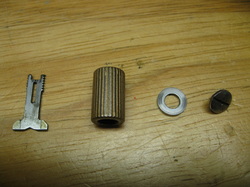
When you've finished disassembly the knob, you'll have four pieces as shown at left.  Next, a light application of lubricant on the inside the knob will aid in reassembly.  

Picture
Putting the knob back together can be a bit tricky because threading the winged piece back into the knob works opposite from the old "lefty-loosey, righty-tighty" principle. 

Start by holding the winged end in your left hand.  Then take the knob in your right hand and screw it onto the end of the winged piece, turning it toward you. This is best shown in video:
 

Next the winged end will be inserted into the slot on the lever and the washer and screw put back in place.  Again, this is best demonstrated in video:
As you can see, it only took a little bit of fumbling to get the pieces back together.  Believe me, it will be a lot easier if one hand isn't tied up holding a camera!

And there you have it.  Make sure everything is firmly tightened and your knob will be good as new. 

Happy Sewing!
Barbara

OldSewinGear...dedicated to helping you get the most out of your old sewing gear.

2 Comments

Lever Alone...the wandering stitch-length selector

2/2/2014

9 Comments

 
So you're sewing along on your 401A, minding your own business, and then out of the corner of your eye you notice something strange...

The stitch length selector is moving upwards.  


All by itself.  


And your stitches are getting shorter and shorter, and shorter... 

Uh-oh, your sewing machine is POSSESSED!

Actually, no.  There is a simple explanation and a simple fix.  

Simply put, there's a nut inside the end of the machine beneath the hand-wheel and if it isn't tight enough then the stitch-length lever will "wander" as you sew.  This is especially true if you're sewing heavy duty fabrics.  The additional load on the machine causes the lever to wander.  
The very early 401A's are particularly prone to this complaint.  In fact, this issue prompted Singer to make a design modification early in the production run. It's a little thing but instantly noticeable when you look at an early model and a later model side by side:  
Picture
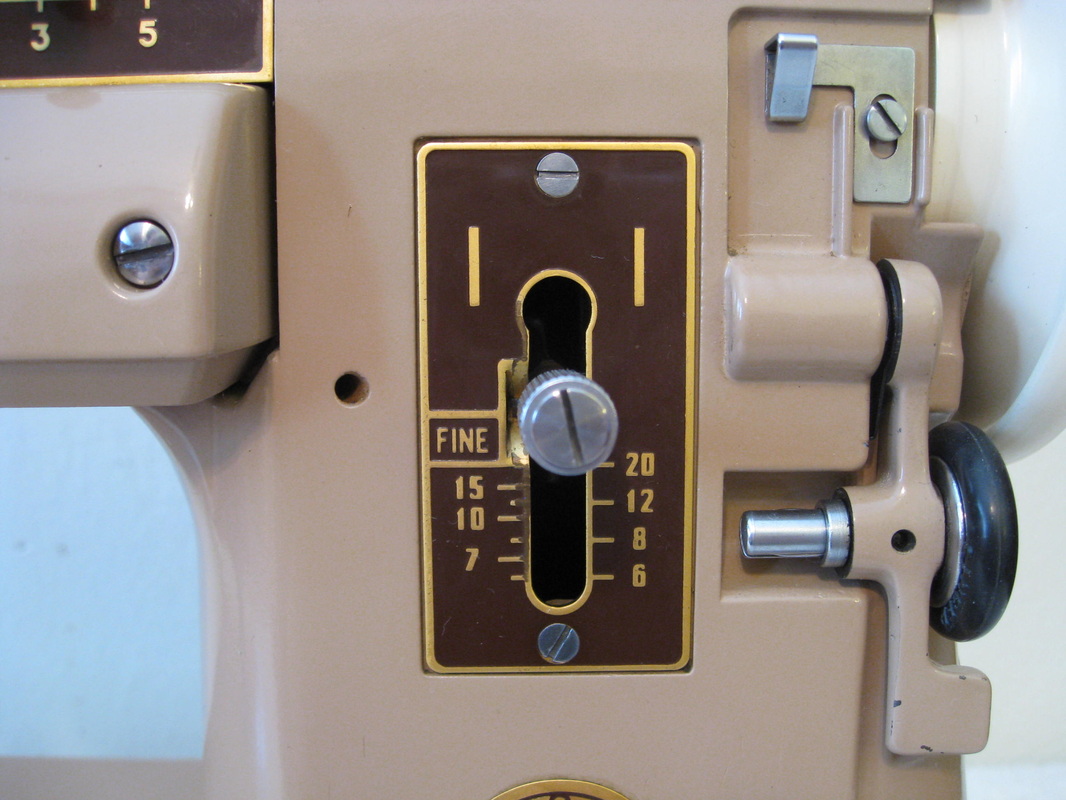
401A - Serial Number 652703
Picture
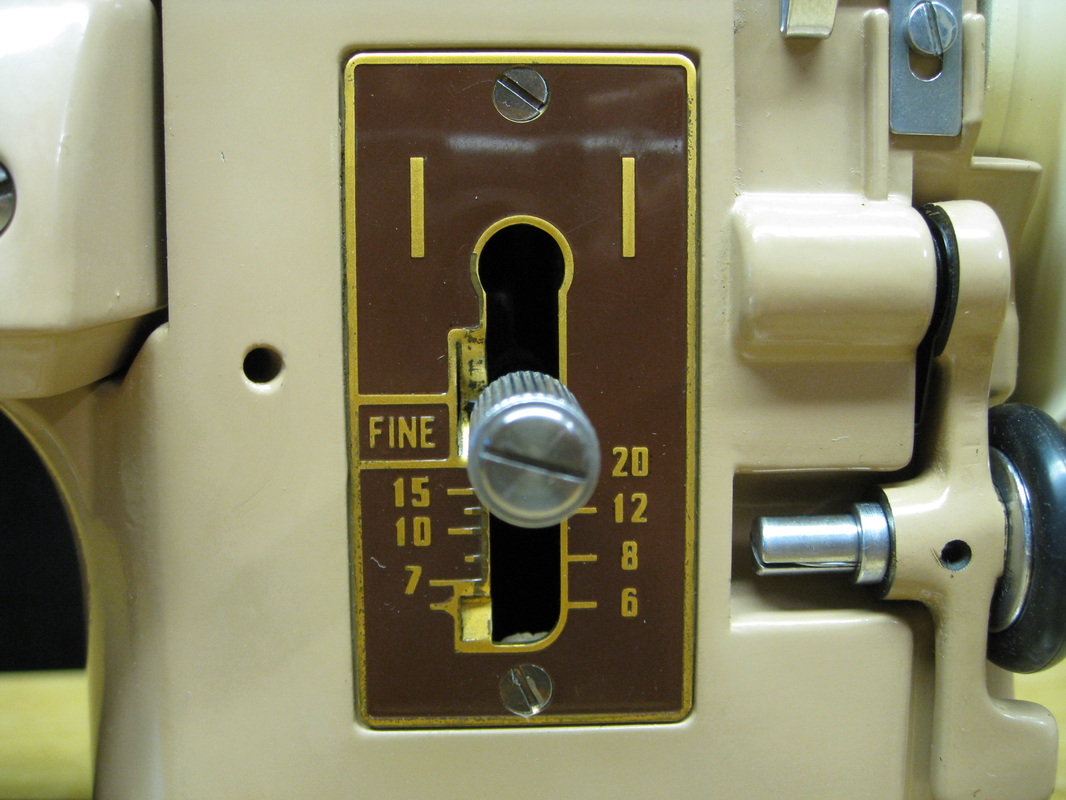
401A - Serial Number 706946
The stitch-length selector plate on the earlier machine is completely flat at the bottom, while the later machine has a notch at the longest stitch length.  This indentation allows you to "lock" in the stitch lever at the longest stitch length.  Which means that the lever cannot move when set at the longest stitch.  Great for sewing heavy fabrics.  

So what if you have one of the machines with the flat plate?  Or what if your lever wanders when set at a shorter stitch length?   What can you do about it?

The adjustment is simple, but first the hand-wheel must be removed.  You'll need a medium-size flat screwdriver and 9/16" socket wrench or large screwdriver:  
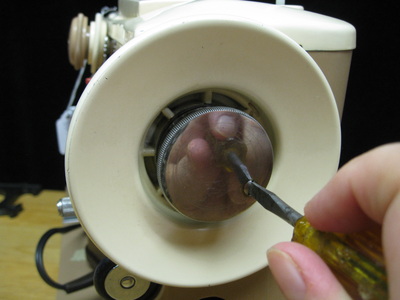
Use the medium-size screwdriver to remove the small screw in the center of the hand-wheel.  

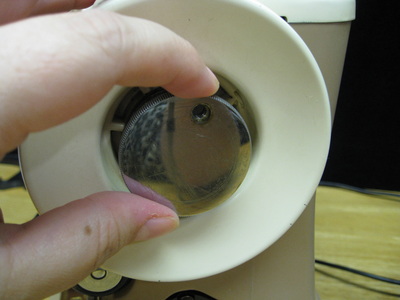
Next remove the chrome center section of the hand-wheel by unscrewing it in a counter-clockwise motion until it comes off.  

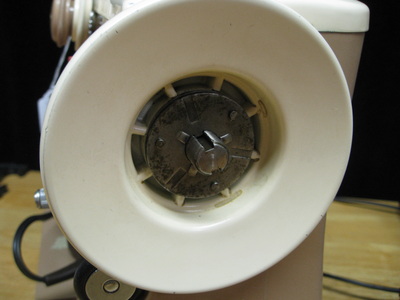
Slide the washer off of the center post.  Then grasp the hand-wheel in both hands and pull toward you.  Look for the recessed hexagonal nut directly beneath the hand-wheel location.  

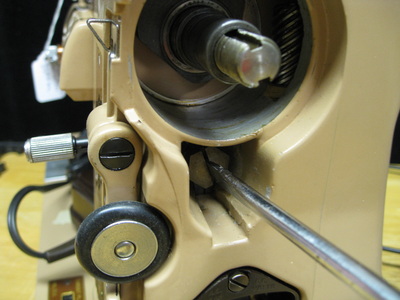
Tighten the nut using the large screwdriver or socket wrench. (The socket wrench provides more leverage and makes for an easier adjustment, but take care not to apply too much force as you can break the head off the nut.)  Usually 1/8th of a turn to the right (clockwise) is sufficient to tighten the lever action, but it may take as much as 1/4 of a turn.  Raise and lower the stitch-length lever to be sure.  You should feel an increase in resistance in the lever as the nut is tightened.  

Reverse the steps to replace the hand-wheel.  

There, you're done!   

Amazing how a simple adjustment can so greatly impact the operation of your machine!

Happy Sewing!
Barbara


OldSewinGear...dedicated to helping you get the most out of your old sewing gear.  

9 Comments

Sewing Retro - Why buy a vintage sewing machine?

9/15/2013

6 Comments

 
Are you:
  • in the market for a sewing machine?
  • wondering how to get the most bang for your buck?
  • getting conflicting information from friends, families, consumer guides, and/or salespeople?
  • Overwhelmed by the sheer number of choices?  
If you answered "yes" to any of these questions, you may be suffering from...

OK, you get the picture, so we'll stop right there.  The good news and bad news is there's no special "syndrome" name for what you're going through.  You're just a typically confused consumer like the rest of us.   

We can't solve all of your problems, but maybe we can answer a couple of questions and help you clarify some of your options.  
If you're reading this blog, then you're likely considering the merits of a vintage sewing machine versus a new sewing machine.  Perhaps you've been told by friends or family that vintage is the way to go.  You may be asking:

"Why should I buy a vintage sewing machine?"

It's a fair question.  Whatever decision you make, buying a sewing machine is an investment and most of us can't afford to choose unwisely.   
Vintage isn't for everyone, but here are my top 5 reasons to buy vintage:

1.  Metal. 
In the old days, almost everything was made from metal and was built to last.  These days it's plastic and it breaks if you breath on it, let alone USE it.
  
2.  Fix-ability.  
We live in a throw-away society.  In the old days if something broke, you could grab a screwdriver and figure out a way to fix it. These days you can't even find the screws.  Manufacturers today expect that if it breaks, you'll throw it away and buy a new one.
Not what you want to hear if you just spent several hundred (or thousand) dollars on a sewing machine.  

3.  Style.  
Curvy metal and glossy paint wins out over molded plastic anyday in my book.  

4.  Power.  
Almost any all-metal vintage machine can hem a pair of jeans, and you can find one for under $200.  But if you want a brand-new jeans-hemming machine, you'll have to pay a heavy duty price.  Even then it will still be plastic and un-fixable if anything goes wrong with it. 
 
5.  Nostalgia.  
There is nothing like sewing on "Grandma's" machine, even when it's somebody else's grandmother.   I learned to sew on my grandmother's Singer Featherweight and these days my sister's grandchildren are learning to sew on the very same machine.  


So there you have it, my top 5 reasons for buying a vintage sewing machine.  


I mainly write about Singer machines on this blog, but there are so many wonderful vintage machines to choose from...Pfaff, Bernina, Viking, Japanese...


My advice is to ask questions, do your homework, and find the right machine for YOU. 


Happy Sewing!
Barbara
OldSewinGear...dedicated to helping you get the most out of your old sewing gear.  
6 Comments

How to thread a Japanese Class 15 bobbin

8/16/2013

2 Comments

 
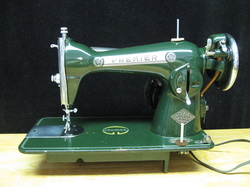
PictureJapanese Class 15 "clone"
If you've already read "Bobbin Case Basics" you won't be surprised by anything you read here.  But you may find it helpful if you own one of the many Singer 15 "clones" built in Japan.  


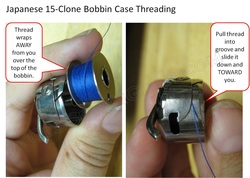
Japanese 15 clones use the same bobbin as the Singer 15 machines, but the bobbin case is set up backwards.  The flat tension spring is on the opposite side, which means the thread wraps in the opposite direction when you insert the bobbin in the case.  

However the basic principle of bobbin loading is the same whether you are loading a Singer 15 or a Japanese 15 bobbin: the thread slides under the tension spring in the opposite direction that it wraps on the bobbin.

PictureThreading Japanese Class 15 bobbin case
Here's the step-by-step:

1.  Hold bobbin case in left hand with open side facing right and slotted groove pointing toward you.  

2.  Hold bobbin in right hand with thread wrapping AWAY from you over the top of the bobbin.  
3.  Insert bobbin into case with a right to left motion. 
4.  Pull thread into the slotted groove.  
5.  Slide thread TOWARD you and DOWN along the tension spring until thread pops into notch at the bottom.  
6.  Load bobbin into machine.
 

There, wasn't that easy?  

When in doubt, refer to your machine's instruction manual for specific instructions.  Or you can visit our "Cheat Sheets" page for printable reference sheets. 


Happy Sewing!
Barbara


OldSewinGear...dedicated to helping you get the most out of your old sewing gear.  

2 Comments
<<Previous

    News, Reviews, 
    & How-To's

    See "Article Index" for list of past articles by title. 

    See "Frequently Asked Questions" for quick answers to common questions.  

    Check out "Cheat Sheets" to download printable reference sheets.

    See "Resources" for links to useful websites and forums. 

    Contact Us

    Questions, comments
    ​or suggestions? 
    Contact us!  

    Categories

    All
    15-125
    15 91
    192 Spartan
    201
    221 Featherweight
    301
    328
    401
    403
    411
    500
    503
    600
    603
    626
    99
    Adjustment/repair
    Appraisal & Pricing
    Attachments
    Bobbin
    Centennial
    Checklist
    Dating
    Greist
    Historical Info
    How To
    Japanese
    Miscellaneous
    Model Comparisons
    Reviews
    Shipping
    Singer
    Slant Needle
    Tips & Tricks
    Toyota
    Toys
    Treadle
    Video


    Archives

    June 2020
    April 2020
    August 2019
    March 2018
    October 2015
    August 2015
    March 2015
    January 2015
    December 2014
    November 2014
    October 2014
    August 2014
    June 2014
    March 2014
    February 2014
    December 2013
    November 2013
    September 2013
    August 2013
    July 2013
    June 2013
    May 2013
    April 2013
    March 2013
    February 2013
    December 2012
    November 2012
    October 2012
    September 2012
    August 2012
    June 2012


    About Us

    OldSewinGear is the collaborative effort of retired repairman Gary and daughter Barbara.  We love old sewing gear and enjoy sharing what we've learned in our vintage sewing machine adventures.  We are located in Roseburg, Oregon. 


    RSS Feed

© 2019 OldSewinGear
  • Blog
    • Blog Index
    • Site Map
  • Singer
    • Slant Needle >
      • 301
      • 401 / 403 / 404
      • 500 / 503
      • 601 / 603 /604
    • Class 15 Machines
    • Class 66 Machines
    • Featherweight
    • Swing Needle
    • Toy Machines
    • Accessories >
      • Buttonholer
      • Discs & Cams
  • Others
    • Pfaff
    • Elna
    • Necchi
    • Japan Class 15
  • Resources
    • FAQ
    • Links
    • Cheat Sheets
    • Shipping & Packaging
  • Contact
    • About Us